 Skip to content
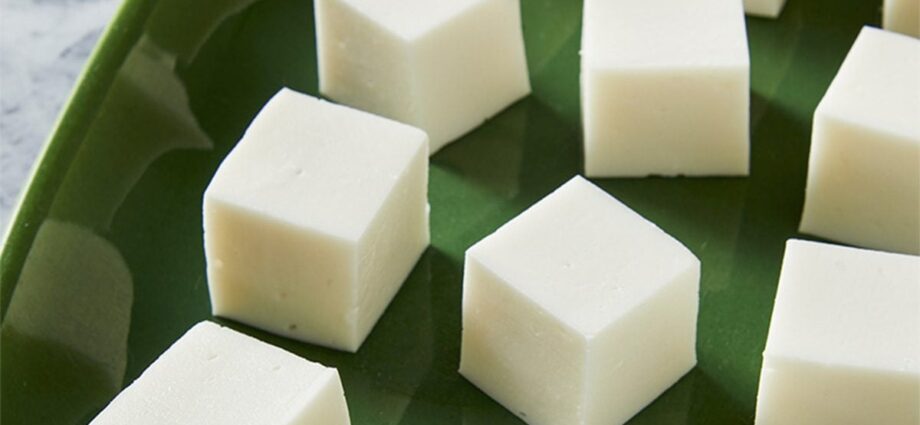

Silky, creamy and lightly sweet haupia is a traditional Hawaiian dessert made for coconut lovers.
I first fell in love with haupia in college when I spent a semester studying in Hawaii (I know, tough assignment!). As nutrition majors, a big part of our experience was learning about Hawaiian food—from traditional cuisine to fusion dishes shaped by the many cultures that call the islands home.
One of our first assignments was to team up and create a Hawaiian-inspired meal featuring classics like grilled Spam, mai tais and the beloved coconut dessert haupia. As a huge lover of both coconut and dessert, I happily volunteered to take charge of the haupia. That first batch was everything I hoped it would be: creamy, dreamy and packed with tropical flavor. But you don’t have to be in Hawaii to make it. With just four ingredients and a saucepan, you can recreate this island favorite at home.
What is haupia?
Haupia is a traditional Hawaiian coconut dessert. It’s lightly sweet, with a texture that’s like a cross between silky pudding and a sliceable Jell-O mold. It’s served chilled and cut into neat squares that hold their shape, making it easy to enjoy with a fork or even your fingers.
Haupia is often served for dessert with Hawaiian favorites like plate lunch, luau dishes and Hawaiian barbecue, where its cool, creamy texture is a refreshing contrast to smoky, savory flavors.
Ingredients for Haupia
- Cornstarch: This is what transforms coconut milk into a sliceable treat. This recipe strikes the perfect balance; the haupia is firm enough to cut into clean squares but still soft and silky enough to melt in your mouth when you take a bite. If you want a softer, more spoonable dessert, simply reduce the cornstarch by a tablespoon.
- Sugar: Haupia doesn’t need much sugar. Just a few tablespoons are enough to enhance the natural sweetness of the coconut milk without overdoing it. That being said, feel free to add a little more if you prefer sweeter desserts.
- Salt: A pinch of salt might not seem like much, but it makes a big difference in balancing the sweetness and bringing out the rich flavor of the coconut.
- Coconut milk: Full-fat canned coconut milk is a must for authentic haupia. It gives the dessert its rich flavor and creamy texture, plus helps it set properly. Skip refrigerated coconut milk from a carton—it doesn’t contain enough fat for the haupia to thicken properly.
Directions
Step 1: Prepare the pan
Lightly grease a 1-1/2-quart glass loaf pan with cooking spray or a neutral oil. This will make it much easier to lift the haupia out once it’s set.
Editor’s Tip: Haupia usually releases easily from a lightly greased pan, but lining the pan with parchment paper can make it even easier to lift out in one piece and cut into neat squares.
Step 2: Cook the haupia

In a small heavy saucepan, whisk together the cornstarch, sugar and salt. Gradually whisk in the coconut milk and 2 tablespoons of water until the mixture is smooth.

Cook and stir the mixture over low heat until it becomes very thick and pudding-like, 8 to 10 minutes.
Editor’s Tip: Haupia won’t set properly if the mixture is undercooked. It should look like thick pudding before you pour it into the prepared pan.
Step 3: Chill the haupia until it’s firm

Remove the saucepan from the heat, and pour the hot mixture into the prepared pan. Smooth the top with a spatula. Let it cool to room temperature, then cover and refrigerate it for at least eight hours or overnight.
Step 4: Slice the haupia
Run a thin knife around the edges of the pan, then carefully invert the haupia onto a cutting board or serving platter. Cut it into 1-inch squares, and serve it chilled.

Haupia Variations
- Add an extract: Haupia is delicious in its classic form, but a splash of almond or vanilla extract adds another layer of flavor.
- Turn it into pie filling: Pour the haupia into a baked pie crust instead of a loaf pan to make an easy coconut cream–style pie. Top it with whipped cream and toasted coconut flakes before serving it.
- Layer it into other desserts: Haupia’s silky texture makes it a delicious addition to layered desserts. Spread it over a shortbread crust and top it with key lime filling for a coconutty twist on key lime bars. Use it as the creamy layer in strawberry pretzel salad, or add it to a chocolate pudding pie.
- Serve with a topping: Garnish haupia with fresh mango, pineapple, kiwi or berries for a bright, refreshing treat. A sprinkle of toasted coconut or macadamia nuts is a fun way to add a little crunchy contrast.
- Add some chocolate: Drizzle cooled haupia with melted dark chocolate or serve it with chocolate sauce for a dessert that tastes a little like a Mounds bar.
How to Store Haupia
Cover leftover haupia tightly or transfer it to an airtight container and refrigerate for up to four days. Haupia softens as it warms, so it’s best served chilled straight from the refrigerator.
Can you freeze haupia?
No, haupia isn’t a freezer-friendly dessert. Freezing and thawing can make it watery or grainy, so it won’t have the same smooth, silky texture as when it’s freshly made.
Haupia Tips

Can you use light coconut milk to make haupia?
No, I wouldn’t recommend using light coconut milk in this haupia recipe. Full-fat canned coconut milk helps haupia thicken and set properly, which is essential for its signature sliceable texture. Light coconut milk contains more water and less fat, so the finished dessert won’t turn out quite as creamy or sturdy. The same goes for coconut milk from a carton. Save those versions for smoothies, soups or curries.
Why didn’t my haupia set?
If your haupia didn’t set, it likely didn’t cook long enough on the stovetop. The coconut milk mixture needs to become very thick (it should have the consistency of homemade pudding) before you pour it into the loaf pan. It also needs at least eight hours in the refrigerator to firm up enough to be sliced into neat squares.
What do you serve with haupia?
Haupia is delicious all on its own, but it also pairs beautifully with fresh fruit like mango, pineapple, papaya, kiwi and berries. Sprinkle it with toasted coconut flakes or chopped macadamia nuts for a little crunch, or serve it with fluffy pancakes or waffles for a tropical-inspired breakfast or brunch.
If you’re planning a Hawaiian-inspired meal, serve haupia for dessert after tropical favorites like grilled huli huli chicken, kalua pork or teriyaki kabobs. It’s a light, refreshing way to end the meal.
