
Nick Lewis is an editor at How-To Geek. He has been using computers for 20 years — tinkering with everything from the UI to the Windows registry to device firmware. Before How-To Geek, he used Python and C++ as a freelance programmer. In college, Nick made extensive use of Fortran while pursuing a physics degree.
Nick’s love of tinkering with computers extends beyond work. He has been running video game servers from home for more than 10 years using Windows, Ubuntu, or Raspberry Pi OS. He also uses Proxmox to self-host a variety of services, including a Jellyfin Media Server, an Airsonic music server, a handful of game servers, NextCloud, and two Windows virtual machines.
He enjoys DIY projects, especially if they involve technology. He regularly repairs and repurposes old computers and hardware for whatever new project is at hand. He has designed crossovers for homemade speakers all the way from the basic design to the PCB.
Nick enjoys the outdoors. When he isn’t working on a computer or DIY project, he is most likely to be found camping, backpacking, or canoeing.
Since Windows 11’s release, Microsoft has gradually been closing the loopholes and methods that allowed users to bypass the Microsoft account requirement.
Initially, it was as simple as disconnecting your PC from the internet before you began the installation process, but now you have to (at a minimum) edit the registry or use a special tool instead. Here is the best way to do it currently.
Use Rufus to Bypass Windows 11’s Microsoft Account Requirement
Rufus is a free and open-source tool that allows you to create bootable media, like USB drives and CDs, for operating systems like Windows and Linux.
It also comes with the ability to completely bypass the Microsoft account requirement, plus Windows 11’s excessive hardware requirements. All you need is an internet connection and a flash drive. I’d recommend something that is 16GB or larger.
The first thing you need to do is plug in your flash drive. Try to use a USB 3.0 port rather than a USB 2.0 port to make things go a little faster. USB 2.0 ports are typically black, while faster USB ports tend to be other colors, like blue or red.
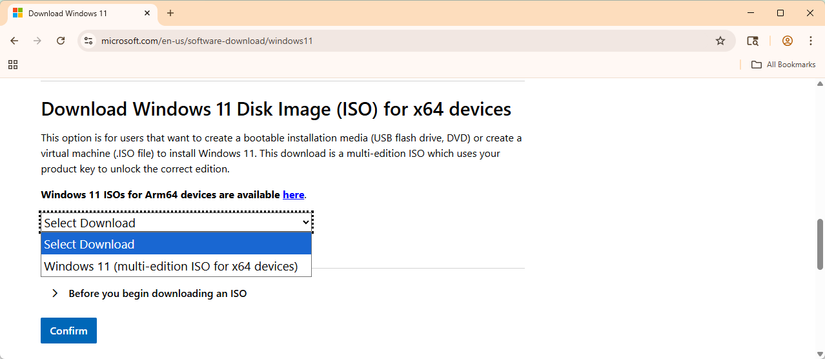
The second thing you need to do is get an image of Windows 11. You can get an official ISO from the Microsoft website.
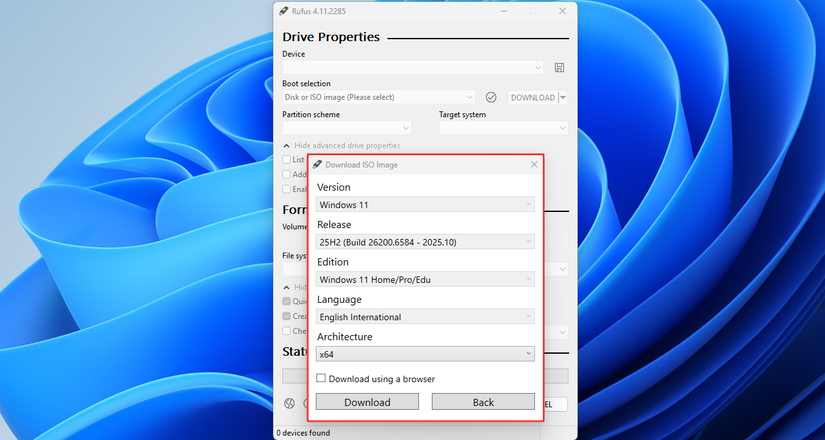
Once that is done, fire up Rufus, click “Select” and pick the Windows 11 ISO you just downloaded. Alternatively, you can use Rufus to fetch a copy from Microsoft for you. Instead of clicking Select, click the arrow next to Select and pick “Download.”
Once that is done, click “Download” and make sure you select “Windows 11,” though it should be the default option. You can make a few custom selections here, like which language version you want. I left mine alone because the default does what I need.
Once it is done downloading, click “Start.”
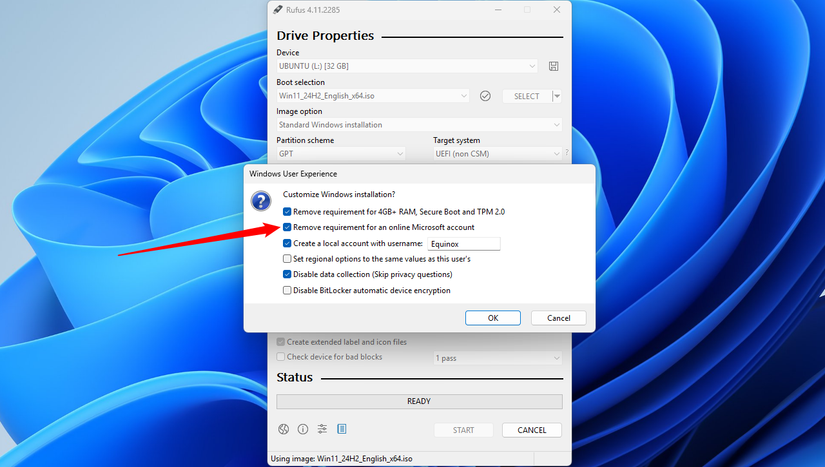
The really important part is the “Windows User Experience” popup. Make sure that you tick the box next to Remove requirement for an online Microsoft account.
Under the hood, Rufus is using a special file that is normally used for an “unattended” Windows 11 install. It just tells the installation process to add a few keys to the registry.
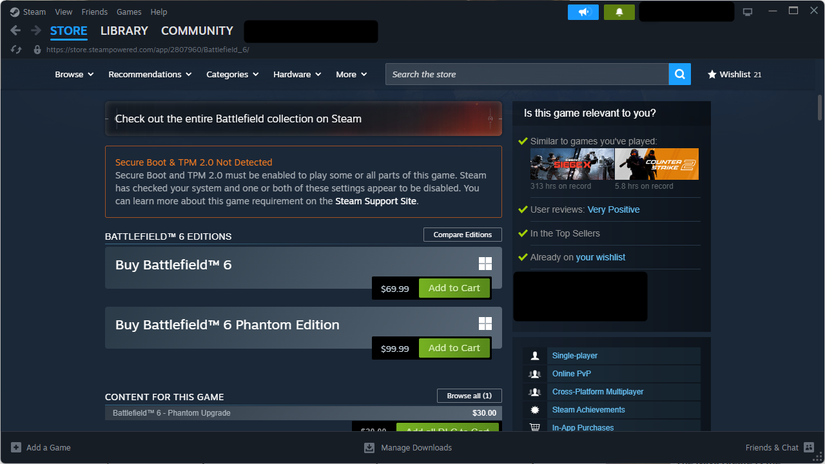
If you want, you can also disable some of Windows 11’s hardware requirements too. However, it is important to remember that some of those requirements (like the RAM requirement) exist for a good reason. Additionally, some software will also require those things to run correctly, so even if you manage to bypass it for now, it may become a problem later.
As an example, an increasing number of games (even single player games, frustratingly) use anticheat that requires both TPM 2.0 and Secure Boot. Without them, you’re out of luck.
Once you click Start, you just have to wait for Rufus to finish formatting your drive. It usually only takes a few minutes, but the exact time is going to depend on how fast your USB drive is and how fast the USB port is.
After the drive is done, you can use it to install Windows 11. Just plug it into your PC, change the boot device to your newly-made Windows 11 installation drive, and follow whatever steps you’re presented with.
It is important to note that Microsoft could theoretically close this method of bypassing the account requirement in the future, or at least make it more difficult for home users to use. I’d recommend keeping this USB drive in a safe place, just in case you need to use it to reinstall Windows 11.
Bypassing the Microsoft Account Requirement Manually
Rufus works by adding a few registry keys to a file called autounattend.xml, which provides a pre-set series of registry keys during the installation process. If automated tools aren’t your thing, you can always do it manually. You should probably disconnect from the internet first, though it isn’t strictly necessary.
During the regular Windows 11 installation process, once you reach the screen that prompts you for a country or region, press Shift+F10 to open up Command Prompt. Type in the following command to add the registry key that will disable the Microsoft account requirement.
reg add HKLMSOFTWAREMicrosoftWindowsCurrentVersionOOBE /v BypassNRO /t REG_DWORD /d 1 /f
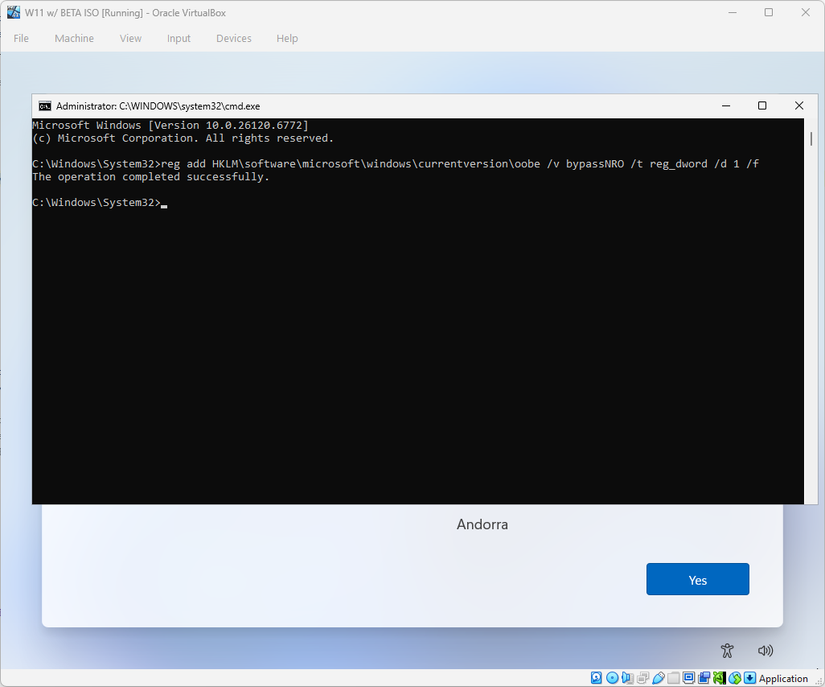
Once that is done, you should be able to proceed with the installation normally.
Microsoft is intent on pushing people into using Microsoft accounts for anything and everything Windows, and it seems likely that the few other remaining ways to bypass the Microsoft account are going to take some hits in the coming years.
I’d recommend keeping a copy of this version of Windows 11 around as an ISO for future use, and I’d also recommend hanging on to any bootable media you create—they may be handy in the future.
